Manage a WordPress blog
Note
Machine translation from the German version. In case of doubt, the content of the German version shall prevail.
This guide explains how to log in to the admin interface and manage, customize, and design your pre-installed WordPress blog via the hosting dashboard.
Registration in the administration interface
Step 1: Access the Plesk URL
Open your browser and enter the Plesk login URL:
Step 2: Enter login details
- Enter your LoginID.
- Enter your password.
- Click on “Log in”.
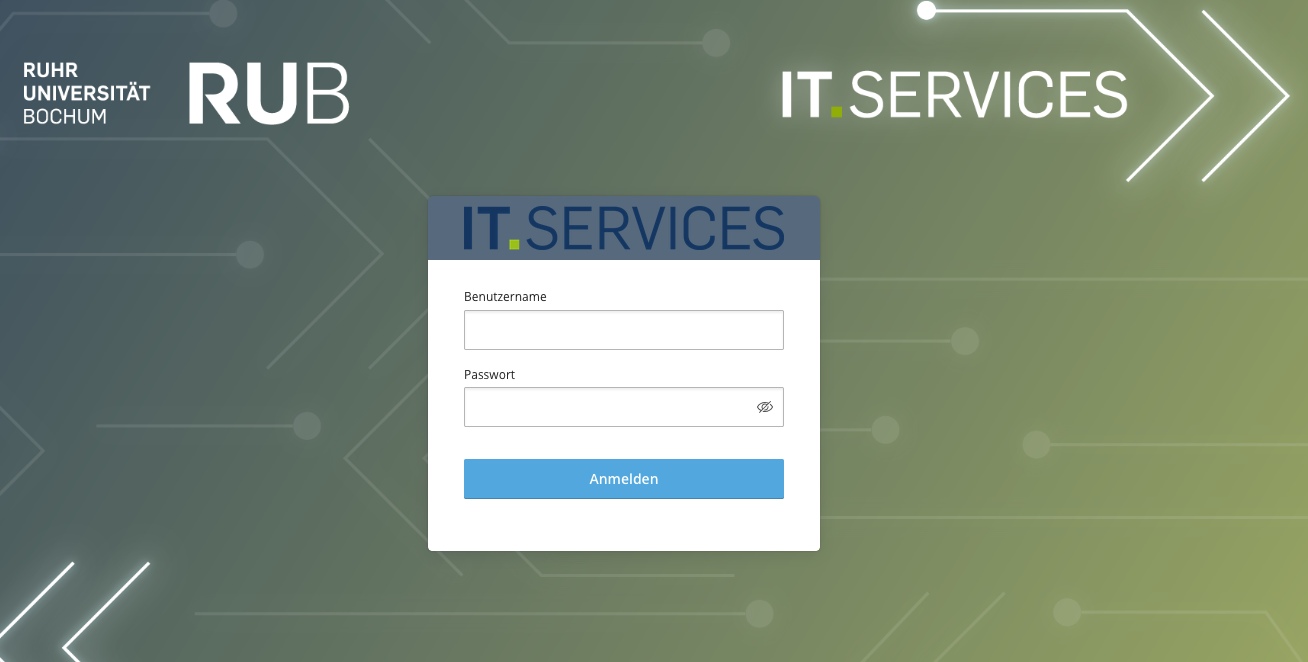
Overview: Plesk Dashboard
After successful login, you will see the Plesk Dashboard. Here you will find an overview of your blog.
Important areas in the dashboard
| Area | Description |
|---|---|
| Websites & Domains | Managing your blog or hosting. By expanding your blog's domain, you gain access to all features. |
| Files | File manager for all files on your blog. |
| Databases | Manage your blog's WordPress database. |
| Statistics | Usage statistics for your blog. |
| Account | Here you can see information about your account. Important: The password management is not functional. |
| WordPress | Manage every aspect of your WordPress installation. |
Manage WordPress installation
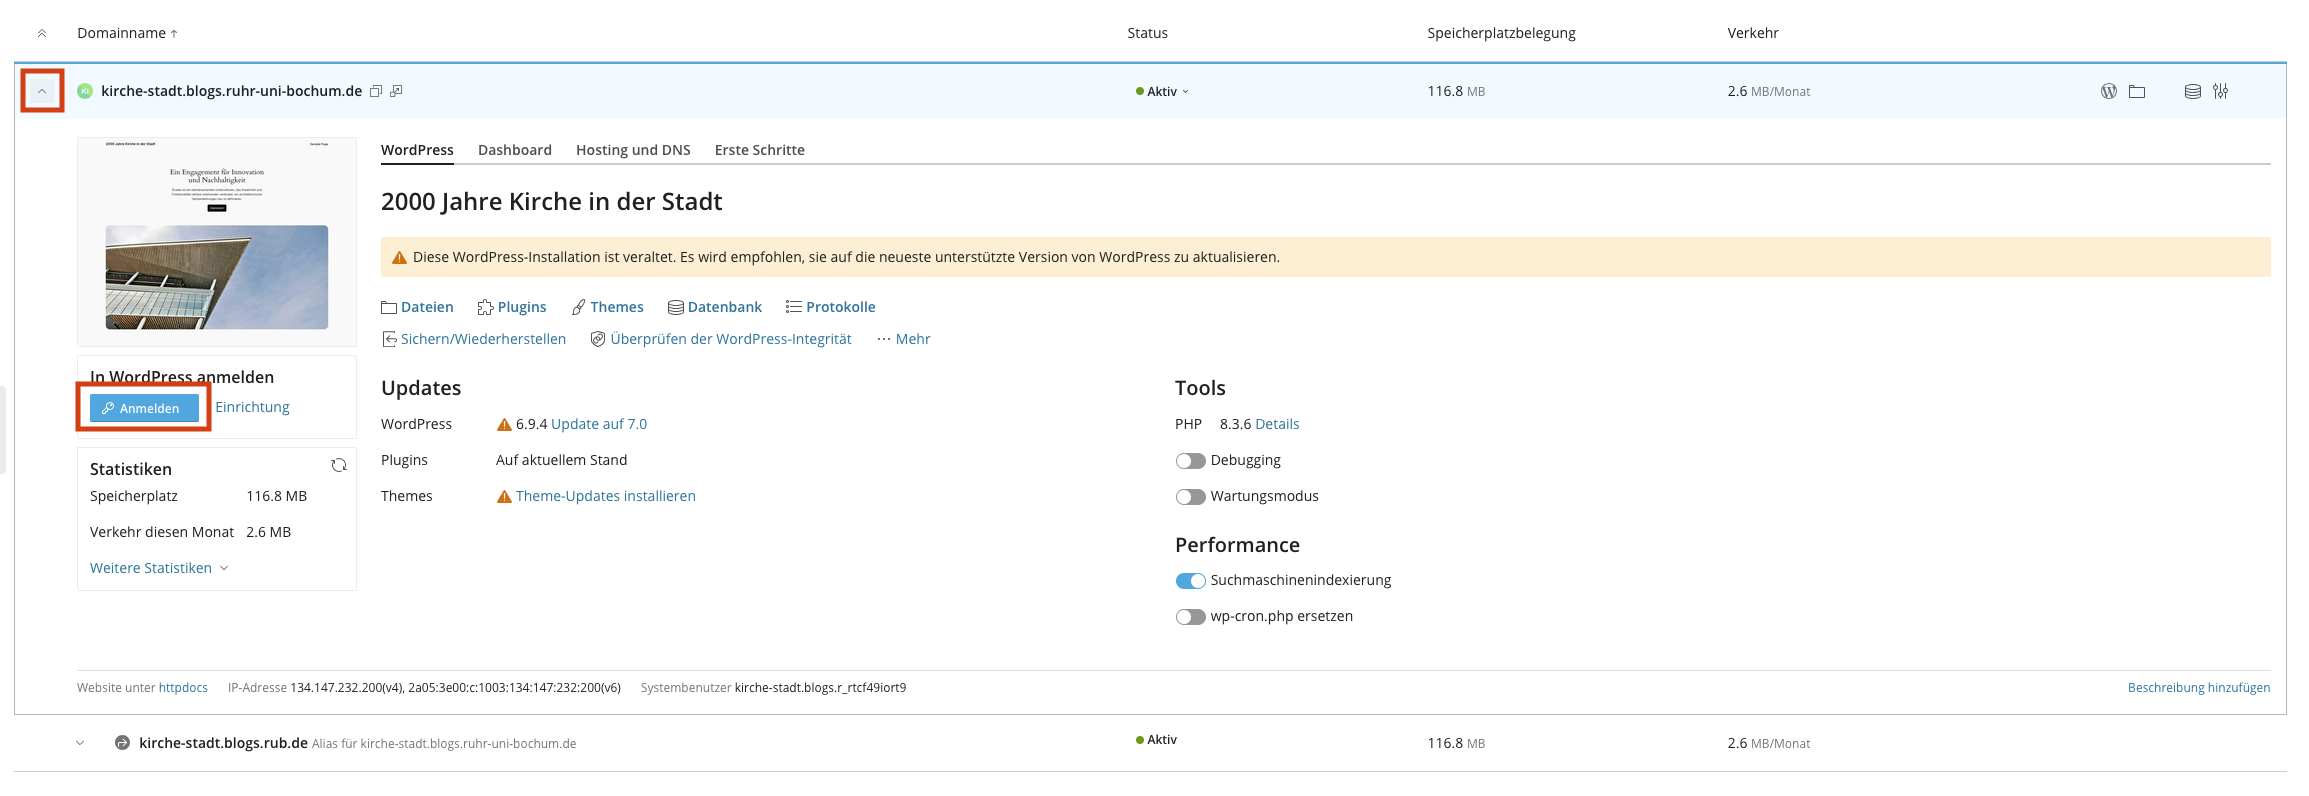
Log in to WordPress
To design the WordPress blog, you need to log in to the WordPress dashboard.
You can expand your blog under "Websites & Domains" and use the blue "Sign up" button.
Carry out updates
⚠️ Important: Always keep WordPress, themes, and plugins up to date to avoid security vulnerabilities!
WordPress updates:
Option 1 1. Log in to the WordPress dashboard. 2. Click on “Update”. 3. Install all available updates.
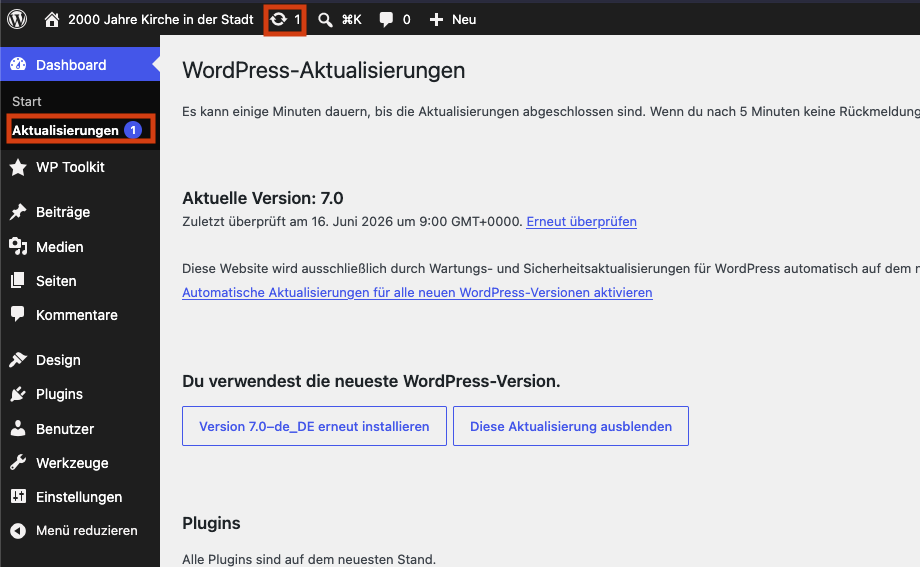
Option 2 1. In the „WordPress“ tab, you can see under „Updates“ whether an update is available. 2. Click on “Update to XX” next to the WordPress version or, if applicable, next to plugins or themes. 3. Confirm the update. With the option “Select all updates” you can install all updates at once.
Enable automatic updates
- Go to Updates in the WordPress Dashboard.
- Enable the option “Enable automatic updates” for plugins/themes (from WordPress 5.6 onwards).
- For WordPress core updates, add the following line to the
wp-config.php: or enable the option under “Updates”. In new WordPress installations, automatic updates for security releases are enabled by default. - Save the changes.
💡 Tip: Updates can cause errors. For major updates, the hosting's backup function can help.
Create and restore backups
❗️ Golden Rule: Create regular backups before making major changes!
Create a backup
- Click on your page under “Websites & Domains” and then on the “Dashboard” tab.
- Click on “Backup and Restore”.
- You can create and manage manual backups here. You can also set up a schedule so that the page is automatically backed up.
Restore backup:
- Click on the desired backup.
- Select the desired recovery option:
- Selected objects allow you to restore databases and files separately.
- „All Objects“ restores the WordPress hosting completely.
- Click on “Restore”.
- Confirm the restoration.
⚠️ Warning: Restoring will overwrite the current website! Any unsaved data will then be lost.
Backups take up the same amount of storage as your WordPress. For everything, the blog service provides 1GB.
Useful information
Official documentation
Tools & Resources:
- Google PageSpeed Insights – Performance test
Support
- In case of problems: its-blogs@ruhr-uni-bochum.de
⚠️ Note: IT.Services assists only with questions regarding hosting (e.g., servers, access, Plesk), not with the design of your blog (design, plugins, content).
This guide is updated regularly. For questions or feedback, please contact support.