LDAP group management
Note
Machine translation from the German version. In case of doubt, the content of the German version shall prevail.
As an administrator of a file share, you can authorize other people to use the file share and set the specific Change Windows permissions for the file share (see instructions on changing access rights). To manage the use of the file share, you must be listed as an administrator of the associated LDAP group. Either you were designated as an administrator when the file share was set up, or the existing administrator added you as an additional administrator.
Add a user to the LDAP group
To authorize another person to use the file share, their RUB login ID must be added to your LDAP group.
-
Log in with your RUB login ID and the associated password via the web interface https://idm.ruhr-uni-bochum.de/rubiks/ldap_gruppen-verwaltung.startseite in the RUB Identity Management System.
-
Select the LDAP group to be managed and click on "Manage users."
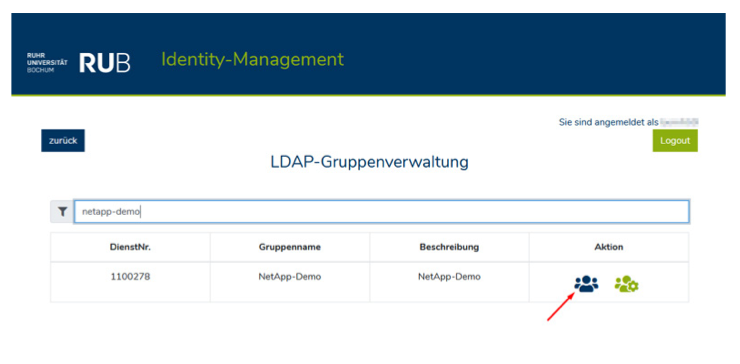
-
Enter the RUB login ID in the text field that should have access to the file share.
-
Confirm by selecting "Add". The added RUB login ID can use the fileshare after the next synchronization with Active Directory, which occurs hourly.
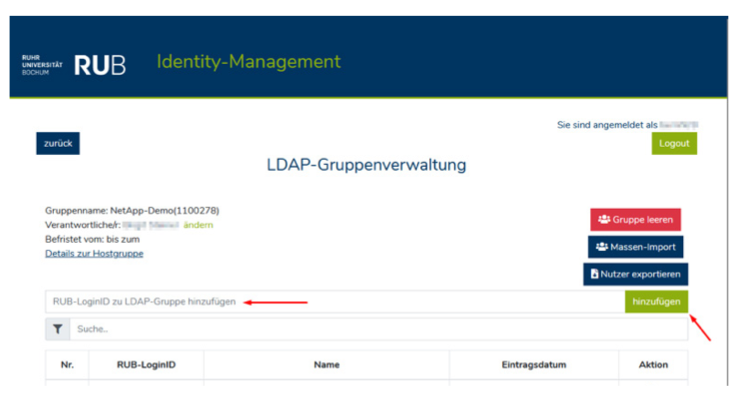
Removing a user from an LDAP group
To remove access to the file share for users, find the RUB login ID in the table and click "Remove user."
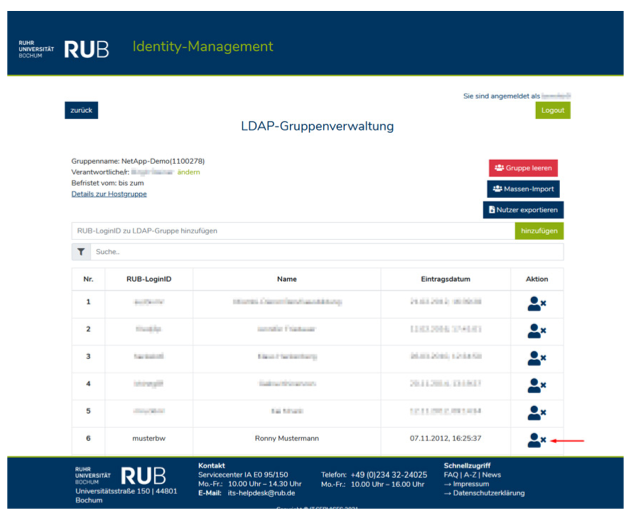
Notes
After registering the user in the LDAP group, it may be advisable to adjust the Windows permissions. In the default delivery state of the file share, the following Windows permissions apply:
- Members of the LDAP group: Read and Execute permissions
- Members of the admin group: Full access
- Domain administrators: (inherited) full access
Users can only change data and create files and directories once they to authorize that