Mapping a network drive
Note
Machine translation from the German version. In case of doubt, the content of the German version shall prevail.
Initial steps for users and administrators of a file share
Highly available storage space is provided for institutions at the RUB to enable shared document manag to enable this and thus simplify collaboration. Information on how to apply for a file share can be found on our homepage. https://www.it-services.ruhr-uni-bochum.de/services/issi/netzlaufwerke.html.de.
What do I need to use the file share?
- A personal RUB login ID. If you do not have a RUB login ID, please contact our service center.
- Your RUB login ID must be a member of an LDAP group to access the corresponding file share. The The file share administrator should have already added your RUB login ID to the associated LDAP group. Membership will only become active after about an hour.
- Your RUB login ID must be activated for the RUB Active Directory. If this is not yet the case, you can Unlocking under https://idm.ruhr-uni-bochum.de/rubiks/cip_rub.freischalten_start yourself. The activation takes place. About an hour later. If the activation does not work, check whether the file share administrator has already has been added to the user group.
- Access to the file share is only possible via a computer in the RUB university network. For WLAN connections, use Please connect to the eduroam network or use a VPN connection. If you are working outside the RUB, you must use Establish a VPN connection to the RUB data network. You can find information about this at https://noc.rub.de/web/vpn.
Note on data security
If you have accidentally deleted or modified data, you can access older versions of your files. Once Daily, all data is backed up in snapshots that you can restore directly. A detailed description as well Further information on file shares and contact details can be found on our website and in the short guide "Recovery". from files from snapshots
Windows
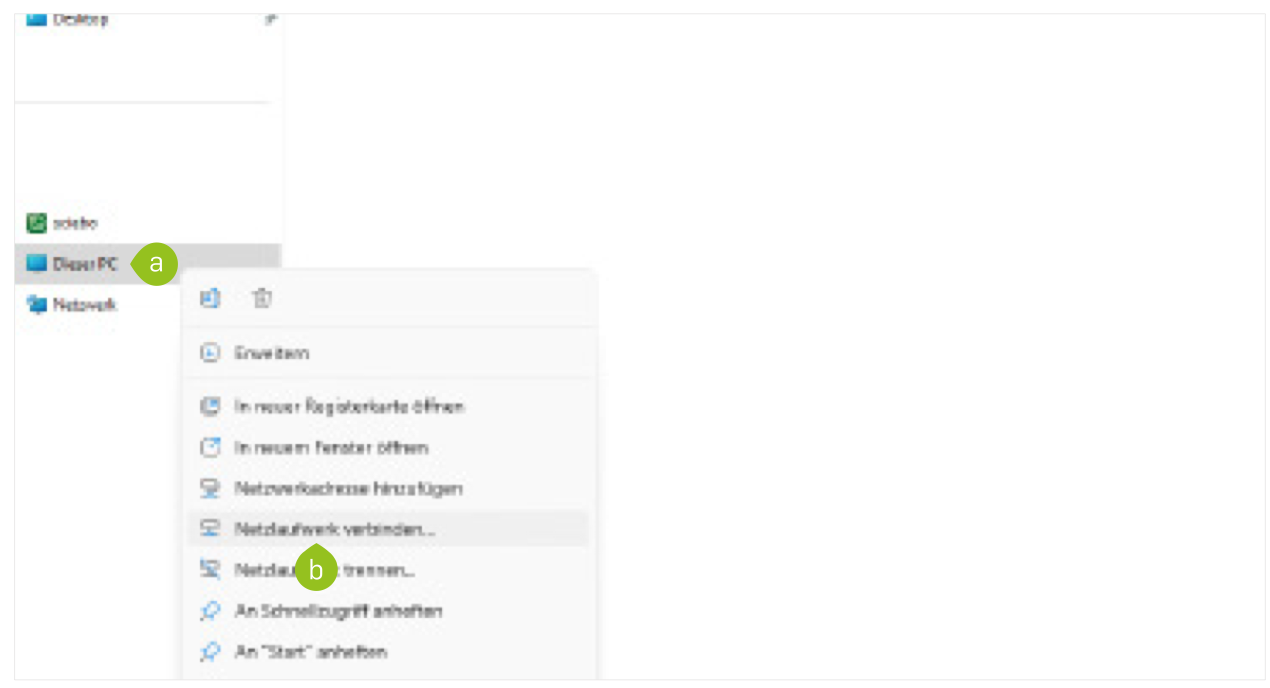
- Use File Explorer to access the network drive. Open Windows Explorer, right-click on "This PC" in the left-hand pane (a), then select "Map network drive" (b).
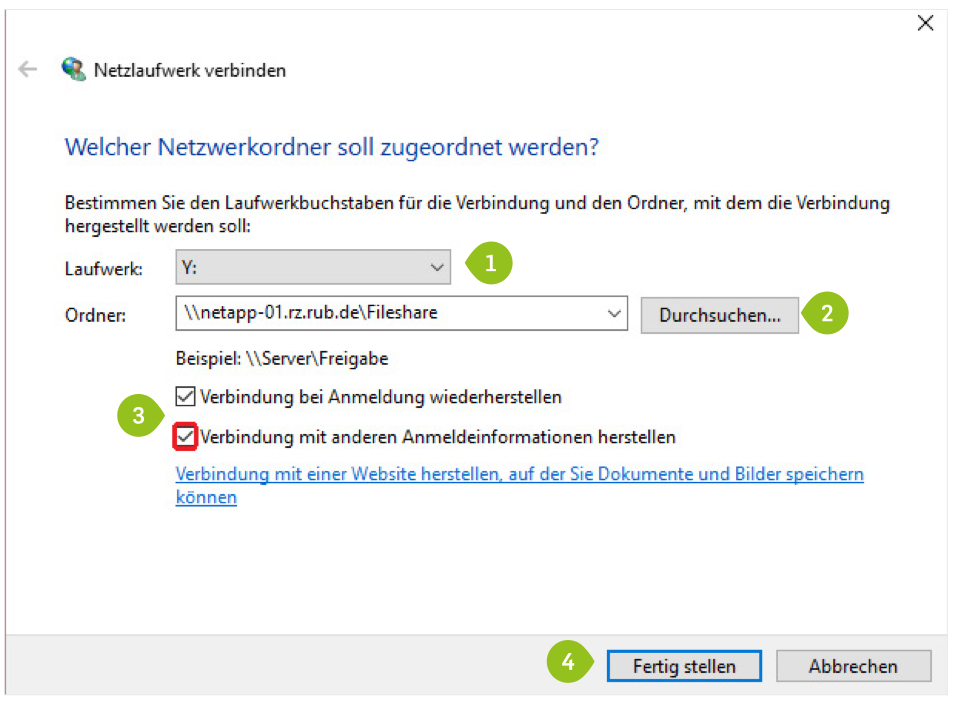
- Select a letter for the drive (1). In the "Folder" field, enter the path to the drive that the fileshare administrator has provided to you (2). Ensure that the checkbox for "Reconnect at sign-in" is checked (3). Click "Finish" (4).
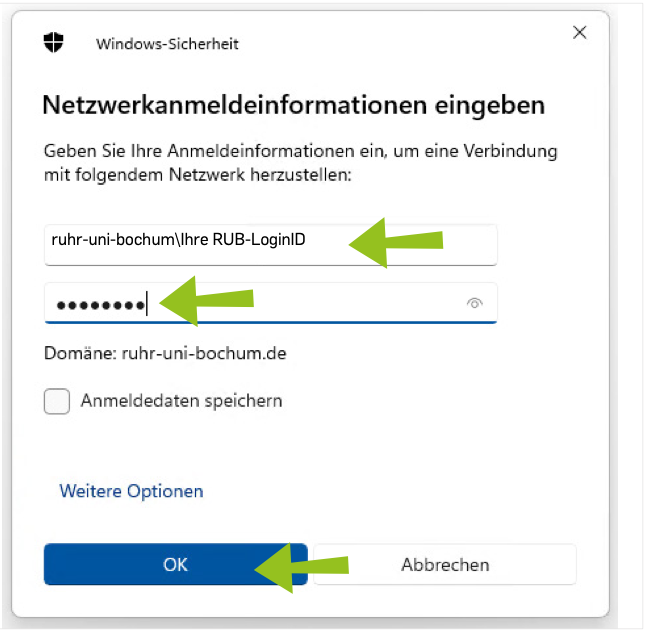
- Enter your RUB login ID and the corresponding password. Confirm with "OK". Important Prefix your RUB login ID with the domain "ruhr-uni-bochum": ruhr-uni-bochum\Your-RUB-LoginID Do not save the login credentials when logging in via VPN.
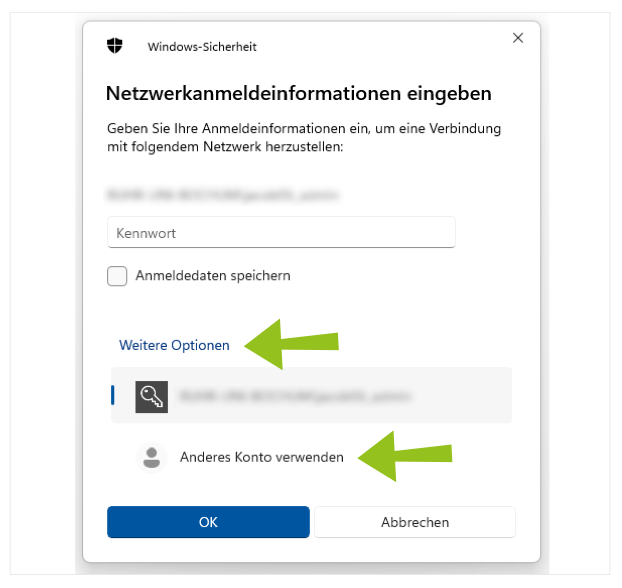
Note If the username is pre-filled, first click on "More options" and then on "Use another account". Then fill in the details as in step 3.
Apple Mac
- Open Finder.
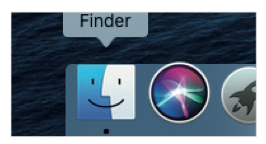
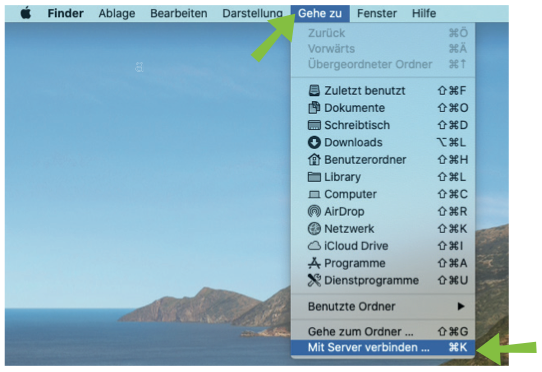
- Select "Go" in the menu bar, then "Connect to Server..."
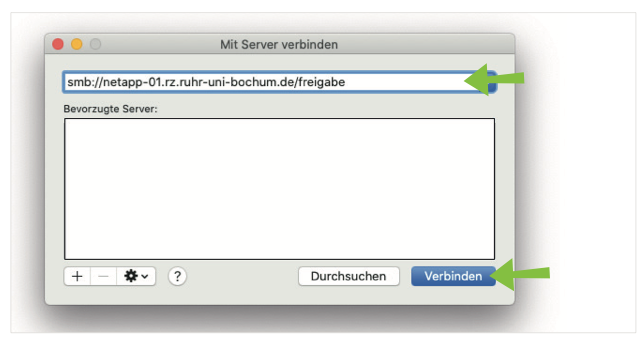
- Enter the address of your network drive in the field above and then click "Connect".
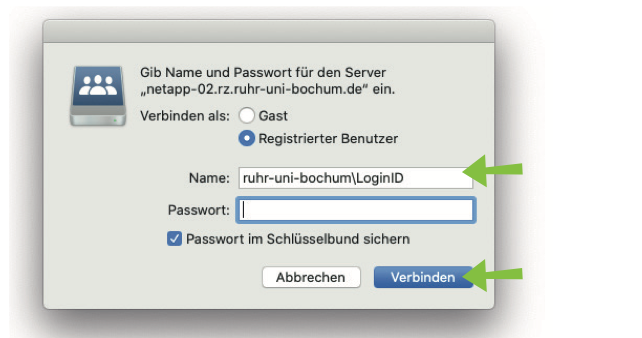
- Enter the username as shown in the image in the login dialog, replacing "LoginID" with your login ID. Then enter your password and click "Connect."
- A new Finder window opens where you can access the file share.
Note When a Mac connects to a network drive, a .DS_STORE file is automatically created. This file contains the current permissions of the connected Mac user and determines which files the user can see and which they cannot. If files are mistakenly not displayed, it can be helpful to delete this file once and then reconnect to the file share.
iOS
Stand 16.08.2022 The native Files app from Apple currently has issues displaying folders with many files on iOS and therefore crashes an error occurs and instead no folder contents are displayed. We recommend that in case of this error you switch to alternative apps.
- Open the Apple Files app.
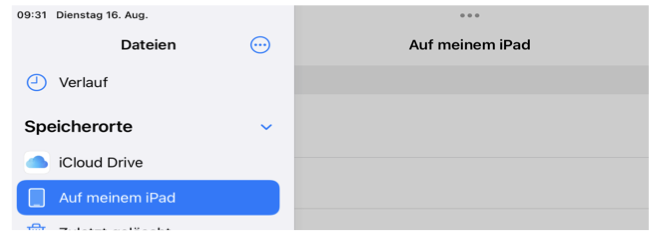
- Select the symbol with the three dots at the top left next to "Files".
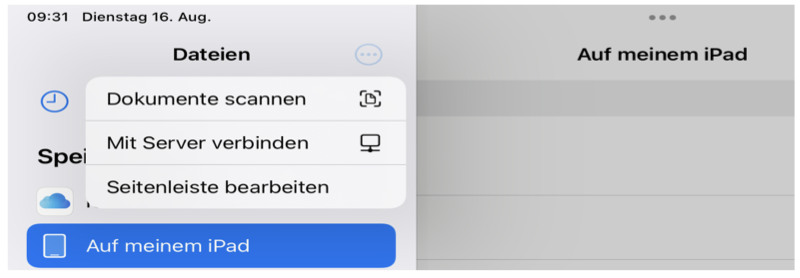
- Select "Connect to server".
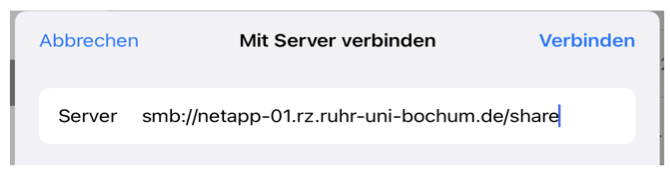
- Next, the name of the network drive must be specified. Example: smb://netapp-xx.rz.ruhr-uni-bochum.de/Sharename
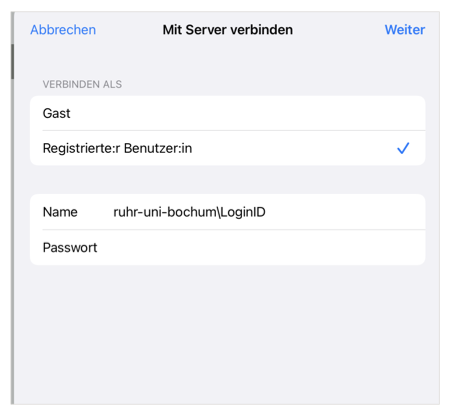
- Now you need to authenticate. To do this, enter your login ID as follows:
Name: ruhr-uni-bochum\LoginID Password: Your password
Now simply select "Connect" and you will be connected to the file share. It will then appear under "Storage locations".
Alternative apps for iOS
If there are issues with using Apple's Files app (e.g., folder contents cannot be displayed), You can also use a third-party app. We recommend the app "Documents" (German name: Documents: File Manager, Music) by the company Readdle in the free version. It can also be used with other applications that have an SMB function work in a similar way. We cannot provide support for this.
- Open the "Documents" app.
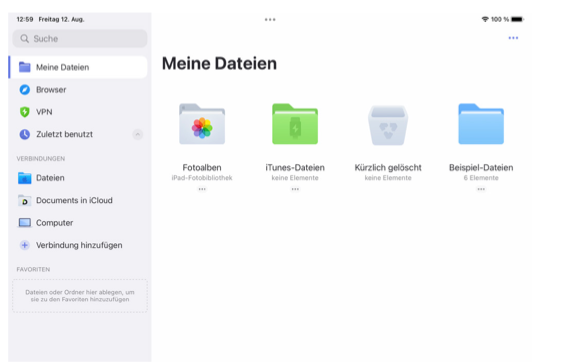
- Select "Add connection" in the left sidebar.
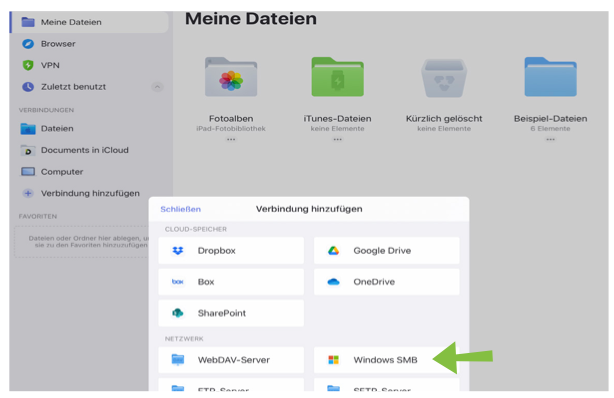
- In the "NETWORK" section, "Windows SMB" must be selected next.
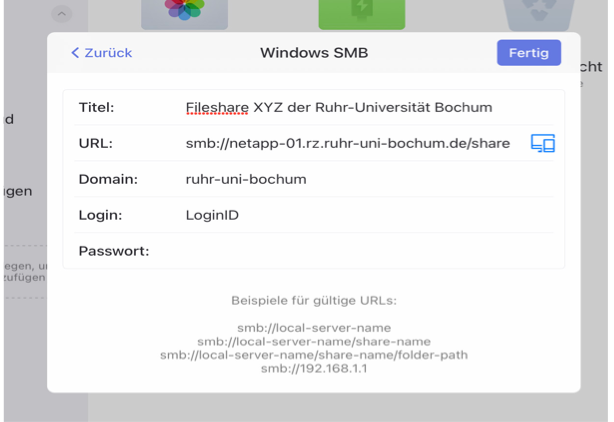
- Now you need to enter the data for your file share:
Title: User-defined (name, as the network drive is designated in the app in the left sidebar) smb://netapp-xx.rz.ruhr-uni-bochum.de/Sharename Ruhr University Bochum Login: LoginID Password: The password for your login ID
Next, confirm the entered data by selecting "Done". The app will now attempt to establish a connection to the file share. Once the connection is established, the file share with the chosen title will appear in the left list.
Further information
If you have entered your access data correctly and the administrator of your file share has set up your RUB login ID for using the file share, the file share will appear in an Explorer window after a short wait. Depending on the settings configured by the administrator for the file share, you will find a working directory created for you or you can directly read, create, or modify files—just as if the data were stored on a locally connected hard drive.
If you cannot access the file share, please check whether the above requirements apply to your RUB account. Login ID and your password are really met.